Showing posts with label baking. Show all posts

Sunday, February 26, 2012

Kids Go Wild for Cinnamon Buns


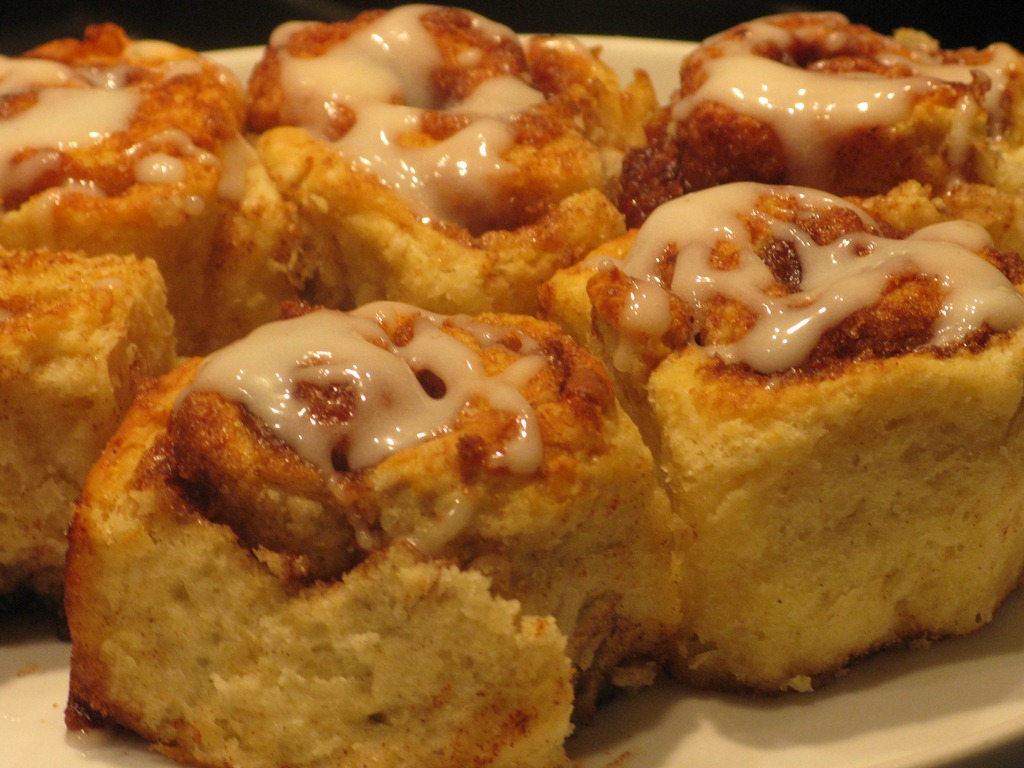
Cinnamon buns don't get much better than this
By Ed Bruske

aka The Slow Cook

We had a near-riot on our hands this week when we made cinnamon buns in our food appreciation classes. Apparently word traveled fast around the campus how good they were. Kids crowded into our kitchen area. I had to send some of them back onto the playground so that we could actually conduct classes.

Even I was a bit surprised that a simple biscuit dough wrapped around some sugary cinnamon could taste so good. These buns were light and tender--but with a hint of cloves in the filling, they packed a powerful flavor punch.

The one tool you will find essential for this is a pastry scraper. That's to get under the dough and roll it into a log. Pry, lift, roll: that's the motion you want, all along the edge of a rather long rectangle, creating a pinwheel log, after you've pressed the filling onto the sheet of dough. If you don't have a traditional pastry scraper, you could substitute an extra-wide paint scraper or a drywall finishing tool. Just make sure it's very clean. You don't need any paint or drywall in your cinnamon buns.

Start by melting 11 tablespoons of butter (1 stick plus 3 tablespoons). The original recipe called for melting various quantities of butter at different stages of the production. But I think it's much easier just to melt all of the butter at once in a small sauce pan. Set it aside to cool.

Meanwhile, in a medium bowl, mix the filling by whisking together 3/4 packed dark brown sugar (we used light brown sugar), 1/4 cup granulated sugar, 2 teaspoons ground cinnamon, 1/8 teaspoon ground cloves and 1/8 teaspoon salt. Stir in 1 tablespoon melted butter, using your fingers to break up any clumps, until the mix looks like wet sand. Set aside.

In a separate, large mixing bowl, whisk together 2 1/2 cups unbleached all-purpose flour, 2 tablespoons granulated sugar, 1 1/4 teaspoons baking powder, 1/2 teaspoon baking soda and 1/2 teaspoon salt.

In a liquid measuring cup, stir together 1 1/4 cups buttermilk and 6 tablespoons melted butter.

Pour the buttermilk mix into the flour mix and stir with a rubber spatula, scraping the bottom and sides of the bowl and pressing the liquid and dry ingredients together until a shaggy dough forms. Pour the dough onto a floured work surface and press it together as you would for biscuits, kneading it a few times. Press the dough into a rectangle with your hands, making sure both sides are dusted with flour. Then use a floured rolling pin to roll the dough into a larger rectangle--about 15 inches long by 12 inches wide. The dough should be about 1/4-inch thick or a bit more.

Rub about 1 tablespoon melted butter over the dough, then pour on the cinnamon mix, spreading it all over the surface of the dough and patting it lightly with your hands. Then at the near edge of the dough use your pastry scraper to lift the dough and roll it over onto itself to form a log. When you are finished rolling, you can squeeze and pat the log along its length to make it a bit more uniform.

Grease a 9-inch metal cake pan with 1 tablespoon melted butter. Use a serrated knife to cut the log into 1 1/2-inch rounds, patting each piece lightly to flatten it a bit, then transferring into the cake pan, packing them as tightly as necessary. Don't worry, they will separate easily after they've been baked.

Pour the remaining melted butter over the top of the buns, then place the cake pan on the middle rack of a pre-heated 425-degree oven for 25 minutes.

While the buns are in the oven, you can make an icing if you like. Stir together until very smooth 1 tablespoon soften cream cheese, 1 tablespoon buttermilk and 1/2 cup sifted confectioner's sugar.

When the buns have finished baking, set the cake pan on a wire rack to cool. When the buns are cool enough to handle, use a pointed knife to gently cut around the edges of each bun and remove them to the wire rack or a sheet pan to cool further. Before serving, drizzle some icing over each bun and watch them disappear.

Friday, February 17, 2012

Kids Make Bacon Cheese Bread


Is there anything bacon can't make better?

By Ed Bruske

aka The Slow Cook

One of the adults at our school asked if we were using turkey bacon to make bacon cheese bread in our food appreciation classes.

"Heck, no!" I replied. "We do not use fake bacon in our classes!"

We teach kids to make traditional foods using traditional tools and techniques. Modern "healthy" alternatives, such as substituting a processed turkey product for real pork bacon, is an entirely different lesson But you could certainly opt for the ersatz bacon when making this bread at home.

And believe me, you will want to make this bread.

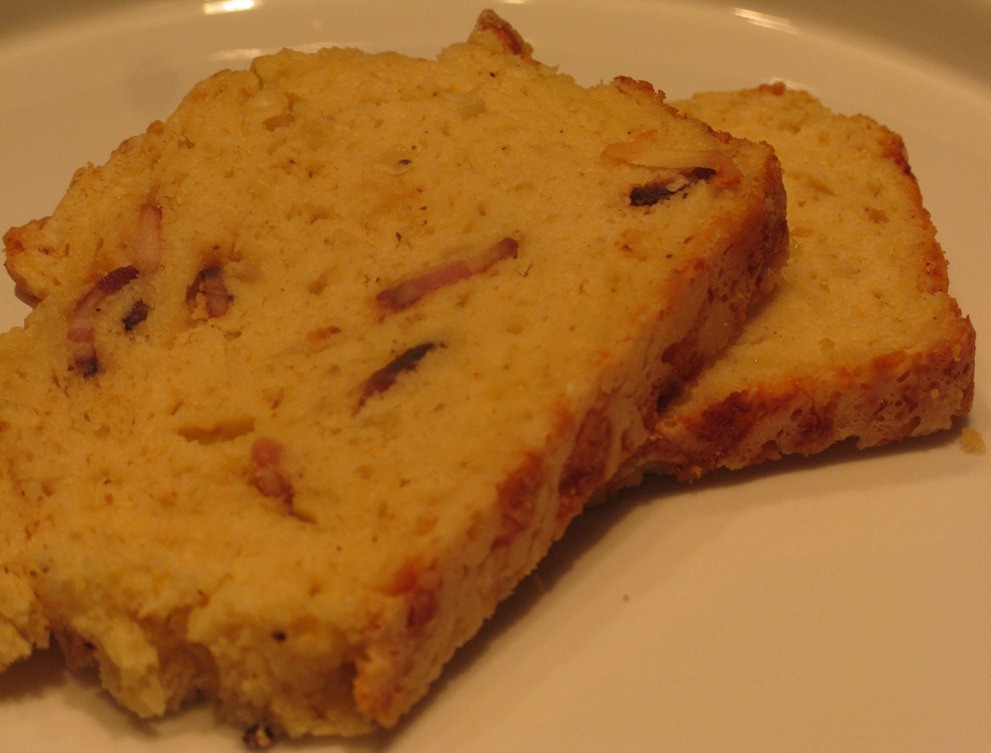
We love to torture the rest of the school with our cooking aromas. The smell of bacon sizzling on the stove top--followed by sauteed onions--started mouths watering all over campus. Add to the bread heaps of Parmesan and Gruyere cheese and you practically have a stand-alone meal that any southern chef would be proud to put on the menu. In fact, this bread would be even more perfect slathered with pimento cheese, another southern specialty.

And it's not at all difficult--or time consuming--to make. This is a quick bread, after all, where baking powder is the principle rising agent.

Start by grating 3 ounces Parmesan cheese over the large holes of a box grater. Set aside. Then grate 4 ounces Gruyere cheese and reserve separately.

Next, cut five slices of thick bacon into 1/4-inch pieces. Sautee these until almost crispy in a heavy skillet over moderately high heat, then drain the bacon onto paper towels, reserving 3 tablespoons of bacon grease in the pan. Next, sautee 1/2 medium onion, chopped fine, until lightly browned. Set aside.

For the wet ingredients used in this bread beat 1 large egg in a medium mixing bowl, then whisk in 1 1/4 cups milk, 3/4 cup sour cream and 3 tablespoons melted butter.

For the dry ingredients, whisk together in a large mixing bowl 3 cups all-purpose flour, 1 tablespoon baking powder, 1 teaspoon salt, 1/8 teaspoon ground black pepper and 1 pinch cayenne pepper. Using a spatula, mix in the 4 ounces grated Grueyer cheese, tossing and stirring until the cheese is completely coated with the flour mix, breaking up any clumps of cheese as you go.

Grease a 9-inch by 5-inch loaf pan with cooking spray. We had some issues with the bread sticking to our pan, especially on the bottom. You might want to line the bottom of the pan with a piece of parchment paper and spray it well. Dust the bottom of the pan with 1/2 the reserved grated Parmesan cheese.

Pour the wet ingredients into the flour mix and mix well with a rubber spatula, scraping the sides and bottom of the bowl until all of the ingredients are incorporated. Scrape the batter into the prepared load pan, smooth out the top and dust it with the remaining grated Parmesan cheese.

Place in a 350-degree oven for 50 minutes, or until the loaf is golden brown and a toothpick inserted into the middle comes out clean. Allow the loaf to cool in the pan for about 15 minutes, then invert and place the loaf on a wire rack to cool further.

Make sure to get a slice for yourself. This bread does not last long!

Friday, February 10, 2012

Kids Make Cranberry Nut Bread


A quick bread loaded with fruit

By Ed Bruske

aka The Slow Cook

The original recipe for this delicious quick bread originally called for fresh cranberries. But with cranberries out of season, we had a choice to make and opted to use sweetened dried cranberries instead. The result is perhaps more like a fruit cake than a bread. So much the better. The kids couldn't get enough.

The kids in my baking classes know by now what a chemical rise is, as opposed to a rise created with yeast. Baking soda and baking powder react with acidic liquids to make dough expand, giving us a tender bread or biscuit instead of a cracker. In this case, we use both baking powder--which contains both alkaline and acidic ingredients--and baking soda to create the rise when combined with orange juice and buttermilk, both of which bring an acid to the equation.

Lots of orange zest, in addition to the juice, also lends a ton of fruit flavor to the bread, complementing the cranberries nicely. Heck, you could serve this bread as a replacement for your traditional cranberry mold. It would be delicious toasted and slathered with cream cheese.

Start with your dry ingredients, whisking together in a large mixing bowl 2 cups all-purpose flour, 1 cup granulated sugar, 1 teaspoon salt, 1 teaspoon baking powder and 1/4 teaspoon baking soda. To this add 1/2 cup coarsely chopped and toasted pecans (we skipped the toasting part) and 1 1/2 cups coarsely chopped cranberries, or dried cranberries.

Meanwhile, in a separate bowl, beat one egg, then the grated zest and the juice of 1 large orange, plus 2/3 cup buttermilk and 6 tablespoons melted butter.

Pour the wet ingredients into the dry ingredients and mix well with a rubber spatula, scraping the sides and bottom of the bowl. When all of the ingredients are incorporated, scrape the batter into a 9-inch by 5-inch loaf pan greased and dusted with flour (we sprayed with Baker's Joy).

Pay careful attention to the baking instructions. Place the loaf in a pre-heated 375-degree oven for 20 minutes, then lower the temperature to 350 degrees and bake an additional 45 minutes, or until the top of the loaf is mahogany brown and a tooth pick inserted into the middle comes out clean.

Allow the bread to cool in the pan 10 minutes, then invert onto a wire rack.

Friday, February 3, 2012

Kids Make "Healthy" Blueberry Muffins


No processed sugar in these muffins

By Ed Bruske

aka The Slow Cook

If you're trying to reduce the saturated fat and processed sugar in your diet, these muffins definitely fall into the category of "healthy." Orange juice, apple sauce and the blueberries lend a bit of sweetness. And for fat, we have canola oil, which contains even more mono-unsaturated fatty acids than olive oil.

But we can't advertise muffins as "healthy" to the kids in our food appreciation classes. The last time we tried, they turned on their heels and ran back onto the playground. No, the best way to market these muffins, we found, is to just have the kids make them. Through the magic of hands-on participation, kids somehow overlook the fact that in this case, a delicious muffin doesn't have to knock them over with its sugar content.

The only trick to these muffins is assembling a somewhat unconventional list of ingredients. For instance, you may not have oat bran--full of vitamins and fiber--or whole wheat pastry flour on your pantry shelf. But we found these readily available at the local Whole Foods. The blueberries in this case were the frozen variety, a stock item in most supermarkets.

Start by whisking together your dry ingredients in a large mixing bowl: 1 1/2 cups oat bran, 1 cup unbleached all-purpose flour, 1/2 cup whole wheat pastry flour, 2 teaspoons baking soda, 2 teaspoons baking powder, 1 teaspoon ground cinnamon, 1/2 teaspoon salt.

In a separate bowl, beat 2 large eggs, then mix in 1 cup plus 2 tablespoons unsweetened apple sauce, 1/2 cup orange juice, 2 tablespoons canola oil, 1 teaspoon vanilla extract.

Pour the wet ingredients into the dry ingredients and mix together, scraping the sides and bottom of the bowl, just until everything is incorporated. Then fold in 1 1/4 cups blueberries.

Grease a standard muffin tin (we used cooking spray) and spoon in the batter. Scatter about 1/4 cup rolled oats over the tops of the muffins and give them a gentle pat. Then place the tin in a 400 degree oven for 18 minutes.

The finished muffins turn out light, moist and bursting with blueberries. Pour yourself a tall glass of cold buttermilk to wash it down.

Note: You can also add 1/2 cup coarsely chopped walnut pieces to the muffin batter for a bit of crunch.

Friday, January 27, 2012

Kids Make Zucchini Bread


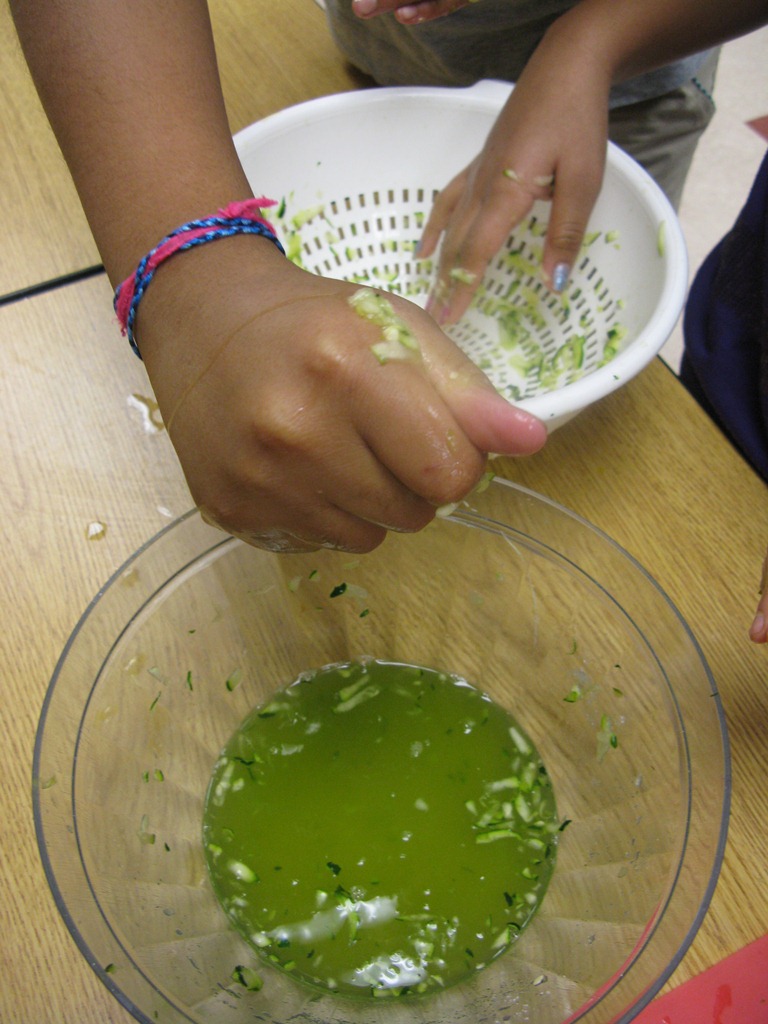
Squeezing water out of zucchini

By Ed Bruske

aka The Slow Cook

The secret to a great zucchini bread, apparently, is getting the water out of the zucchini.

You don't want a wet, leaden bread. And as the kids in my food appreciation classes learned, squash--like most vegetables--is mostly water. Salt or sugar added to grated zucchini penetrates the cell walls on a molecular level, drawing out copious amounts of liquid. Left standing in a colander over a bowl for an hour (or overnight) will produce a cup of water or more from a pound of squash. You can then squeeze out even more with your hands, or by twisting the zucchini in batches in a tea towel.

(One of the kids wanted to taste the water after we'd given the sugar treatment. We did. Not bad! Green and sweet.)

So start your zucchini bread with a pound of squash. Trim off the ends, cut into manageable pieces and grate using the large holes of a box grater. Placed the grated zucchini in a colander set over a bowl and toss in 2 tablespoons sugar. Allow to sit at least an hour--or overnight--then squeeze as much of the remaining liquid out of the zucchini as you can. Set aside.

Meanwhile, whisk together 2 cups all-purpose flour, 1 teaspoon baking powder, 1 teaspoon baking soda and 1/2 teaspoon salt. These are your dry ingredients for the bread.

In a separate bowl, beat two eggs. Add 1/4 cup plain yogurt, the juice from 1/2 lemon (strain out the seeds), 1/2 cup plus 2 tablespoons sugar and 6 tablespoons melted butter. Combine well. These are your wet ingredients. Stir in the grated zucchini.

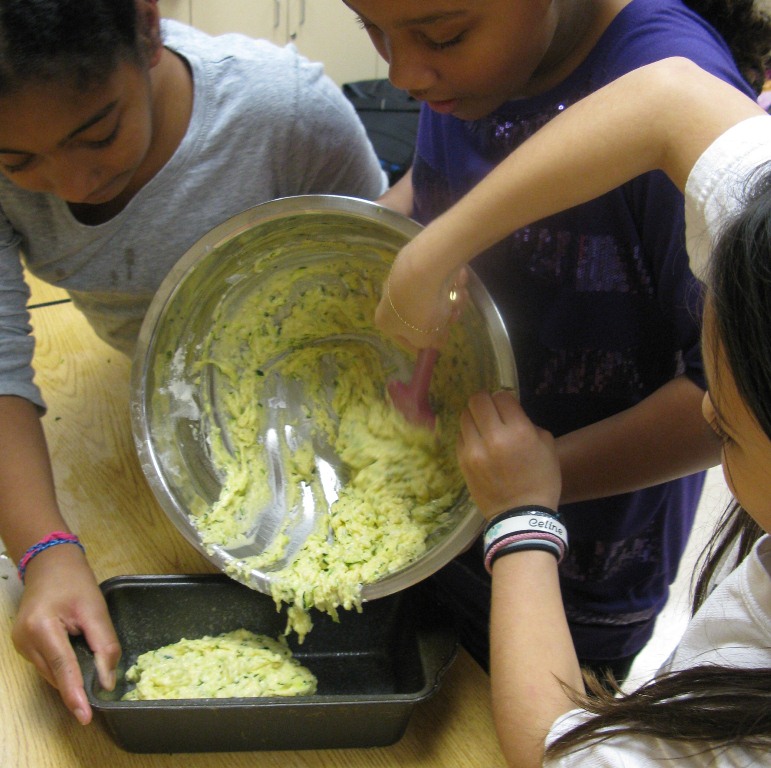
Add the wet ingredients to the flour mix and gently combine with a rubber spatula, scraping the sides and bottom of the bowl. Pour the mix into a 9-inch by 5-inch loaf pan that has been greased and dusted with flour. (We sprayed with Baker's Joy).

Place the loaf pan in a 375-degree oven and bake for 55 minutes, or until the top is nicely browned and a toothpick inserted into the middle comes out clean. Invert the pan to remove the loaf and allow to cool on a wire rack.


Scraping batter into the load pan takes teamwork

Our kids loved the zucchini bread just as it was. In truth, even though the bread is flaked with zucchini, making it quite pretty, you can't really taste the vegetable. In an ideal world, you would serve the bread warm, slathered with cream cheese and washed down with a tall glass of cold buttermilk.

Friday, January 20, 2012

Kids Make Spinach and Mushroom Quiche


Filling quiche takes teamwork

By Ed Bruske

aka The Slow Cook

How do you get kids to eat spinach? Make quiche!

Even I was surprised by how eagerly kids took to quiche when it was filled with spinach and mushrooms. Well, not every kid was overjoyed about the mushrooms. Or the spinach. Still, this quiche was a huge hit in our baking classes this week, leaving me to wonder why, in all the years I've been teaching food appreciation at a private elementary school here in the District of Columbia, quiche had never made it onto the menu before.

It's a great project for the kids, loaded with all kinds of kitchen skills to learn.

First, the crust. No store-bought crust for us. The trick to a flaky, delicious, made-from scratch pie crust is to keep the ingredients--especially the butter--very cold and add only enough water to get the flour to bind together. You don't want to add too much liquid, or work the dough at all. And ideally you'll want to start on this a day ahead, or at least several hours.

To make one 9-inch quiche, whisk together in a large mixing bowl 1 1/4 cups all-purpose flour, 1/2 teaspoon salt, 1/2 teaspoon sugar. Add to that 1/2 cup (1 stick) chilled, unsalted butter cut into pieces. Using a pastry cutter or two knives (most people would do this pulsing in a food processor), cut the butter into the flour until the mix is granular, with a few pea-size pieces. The butter should be thoroughly incorporated into the flour, but you don't want to work it too much. In fact, when you roll the dough out later, you will see flecks of butter in the flour.

To this mix add 1 or 2 tablespoons ice water. That's right, we're dealing with tablespoons of water. Use a spatula to turn and press the flour to incorporate the water. Continue adding water a tablespoon at a time until a dough begins to form. It won't look like a dough yet, but you should be able to gather it with your hands and press it together. When it just holds together, you can stop adding water. Pour the dough onto a floured work surface, press it into a disk about 3/4-inch thick and wrap in plastic. Store the dough in the refrigerator several hours or overnight.

Pre-bake your crust by again turning the dough onto a floured work surface and rolling it out into a circle large enough to overlap the edges of a 9-inch pie plate. Now, wrap the dough around your rolling pin--dusted with flour--lift and transfer the dough to the pie plate. Press the dough into the bottom edge of the pan. Use a sharp knife to trim away the excess dough from the edges and crimp the edge with your fingers to make a decorative presentation. (We then lined the inside of the dough with aluminum foil and filled the bottom with ceramic pie weights--little marbles that hold the crust's shape while it's in the oven. Skip this if you don't have the pie weights.)


Do try this at home

Bake the dough in a 375-degree oven for 20 minutes, or until it is fairly firm to the touch and beginning to lightly brown. Remove and set on a wire rack to cool.

Meanwhile, for the custard, mix together in a large bowl 2 large eggs plus two yolks. (The kids always have a blast with this. We separate the eggs by cracking them into their cupped hands.) Add 1 cup milk, 1 cup heavy cream. Stir in 1/2 teaspoon salt, 1/2 teaspoon white pepper and a generous pinch nutmeg.

Use about 2 ounces each chopped frozen spinach (wrung dry), chopped mushrooms and grated Gruyere cheese. The original recipe I used as a guide for this called for a ridiculous amount of these ingredients. We just eyeballed it, adding only enough to make their presence known in the finished pie. Add too much, and you won't have room for the egg custard, which binds everything together. As it was, we had some of the egg mix left over.

Place the crust with the filling on a sheet pan and place this on the middle rack of the oven heated to 375 degrees. Only now do you pour the egg mix into the pie shell. You don't want to be to carrying a shell filled to the brim with egg liquid across the kitchen after all.

Bake for 38 minutes, or until the quiche is firm to the touch and cooked through. Allow to cool for a while--but do try serving it warm. It makes such an impression, fresh from the oven. Serve with your favorite salad, breakfast, lunch or dinner.

Friday, January 13, 2012

Kids Make Coconut Cake


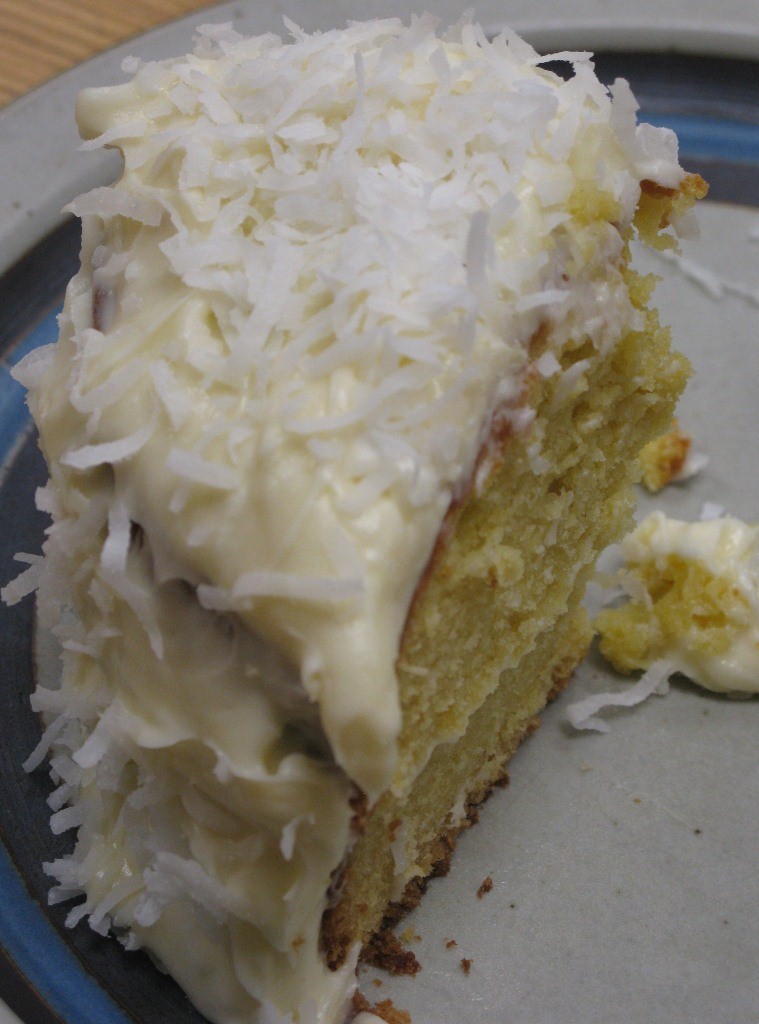
It tastes as good as it looks

By Ed Bruske

aka The Slow Cook

Coconut cake is a tradition in southern parts of the United States, but it also reminds us that somewhere in the world it's warmer, even when the snow flies here.

Traditional coconut cake calls for at least two layers. That presented a bit of a problem for our baking classes, since a whole cake made according to the original recipe would have been far more than we could have eaten. I talked about this with my wife, the baking expert in our family, and we decided to cut the recipe in half, but use a smaller, taller cake pan so that we could cut the finished cake in half and still end up with two layers. So instead of baking in two standard 9-inch pans, we chose a single 6-inch pan that's 3 inches tall.

The only problem with this approach is that it throws the cooking time off a bit. The taller cake takes somewhat longer to cook all the way through the middle. After a bit of experimentation, we came up with an ideal cooking time of 58 minutes in a 350-degree oven. I also placed a sheet of aluminum foil over the cake when there was about 10 minutes left on the clock to prevent the top from browning too much.

The result is just a teensy bit of crustiness around the edges of this cake. But no one notices when the cake is finally frosted. And the finished cake is just the right size for a class of 12 kids, and more than enough for the typical family. Otherwise, you can simply double this recipe and go back to making two layers in separate 9-inch pans.

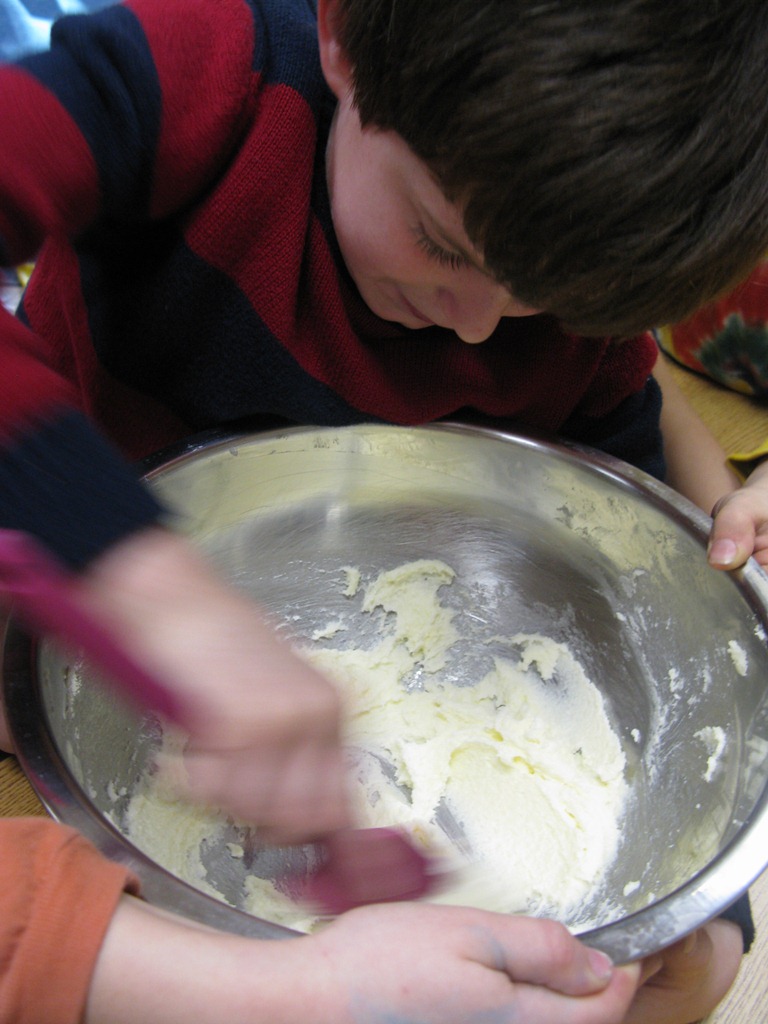
Start by creaming together 1 1/2 sticks butter (16 tablespoons) and 1 cup sugar. Most people would do this in an electric mixer, but we do everything by hand. I make it easier by allowing the butter to come to room temperature and soften overnight. After incorporating the sugar into the butter, beat at least five minutes with the back of a wooden spoon or a firm rubber spatula until the mix is fluffy and lighter in color. Then, beat in 3 eggs, one at a time, as well as 3/4 teaspoon vanilla extract and 3/4 teaspoon almond extract. At this point, the mix will look like scrambled eggs but smell more like marzipan.


Creaming butter and sugar

Meanwhile, in a separate bowl, sift together 1 1/2 cups all-purpose flour along with 1/2 teaspoon baking powder, 1/4 teaspoon baking soda and 1/2 teaspoon salt. Fold about 1/2 cup of the flour mix into the batter, followed by 1/4 cup milk, then another 1/2 cup flour mix and another 1/4 cup milk. Finally, fold in the remaining flour mix until it is just incorporated. Stir in 2 ounces shredded, sweetened coconut.

Prepare your can pan (or pans) by greasing well with butter or oil spray. We also cut a piece of parchment paper to fit into the bottom of the pan and gave it a spray of oil as well. Scoop the batter into the pan and tap it hard on your work surface to smooth it out. Place in the middle of a 350-degree oven and bake 58 minutes, or until a toothpick inserted into the middle of the cake comes out clean.

Allow the cake to cool for 20 minutes in the pan. Then use a sharp knife to trace around the edge of the pan. Invert the pan to remove the cake and place it on a wire rack at least an hour to cool. If making a smaller, taller cake as we did, slice the cake cross-wise to create two layers.


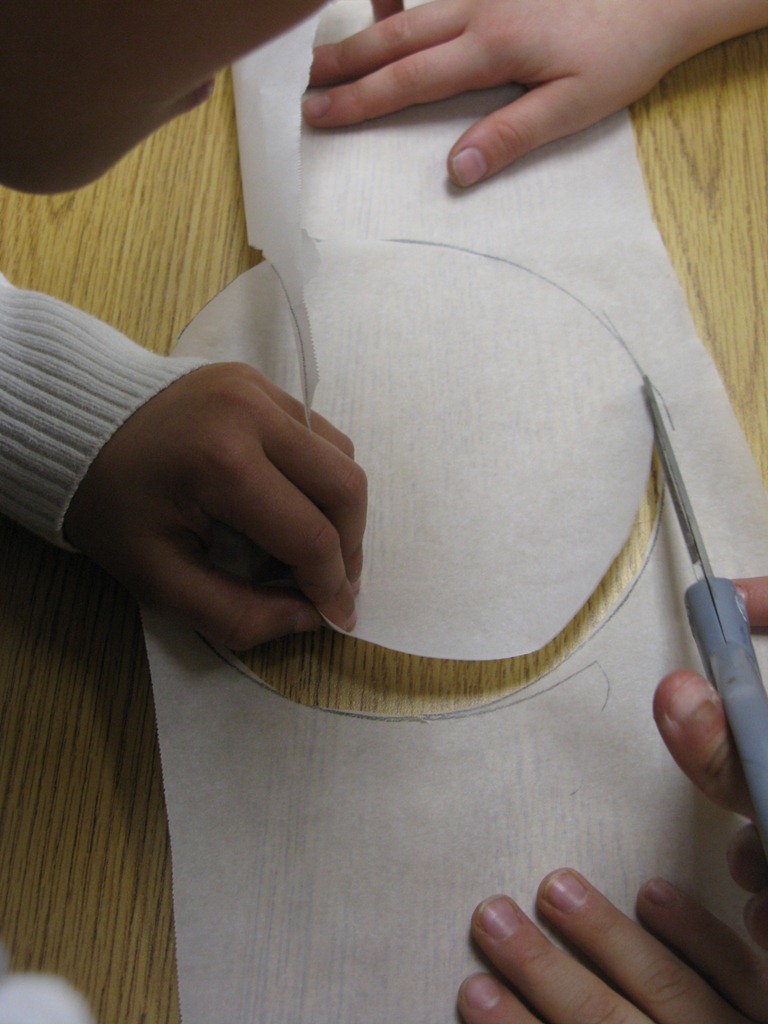
Cutting parchment paper

For the frosting, cream together 1 stick butter and 1 8-ounce package cream cheese. As I did for the cake, I left the butter and cream cheese out overnight to soften. Creaming them together with a rubber spatula is easy at that point. Add 3/8 teaspoon vanilla extract and a dash of almost extract. Stir well, then work 1/2 pound sifted confectioner's sugar into the mix and stir until very smooth.

Spread frosting over one of the cake layers, top with the second layer and spread the frosting all over the top and sides. Sprinkle the top of the cake liberally with shredded coconut and pat more coconut along the sides.

Hard as this may be to believe, some kids don't like coconut. But the ones who do will love you for making this cake. (So will your adult friends.)

Friday, January 6, 2012

Kids Make Orange Poppyseed Cake


A delicious cake with seasonal fruit

By Ed Bruske

aka The Slow Cook

What kind of fruit is seasonal in January?

That's the question I put to the kids in my food appreciation classes this week. The answer, of course, is citrus fruit. And where can you possibly grow fruit in the middle of winter? That's how cooking becomes a lesson about geography and climate. Toss in baking soda, baking powder and buttermilk and you also have a science experiment.

Everyone who tries this cake has the same reaction: "It's not too sweet." That's because the final flourish isn't a thick layer of sugary icing, but a drizzle of orange and lemon juice with just enough sugar added. It's an incredibly simple cake with just a few ingredients, but the poppy seeds also set it apart. The kids thought they looked like tiny blueberries, but then they remembered seeing them on bagels. Come to think of it, you don't see poppy seeds in many other foods.

Start by creaming 11 tablespoons room-temperature butter (1 stick plus 3 tablespoons) along with 1 cup sugar, the grated peel of 2 oranges, 2 teaspoons baking powder, 1/4 teaspoon baking soda and 1/4 teaspoon salt. We grated the oranges on our old-fashioned box grater. It doesn't take long at all. But you could do the same thing with a micro-plane. And while we did the creaming with the back of a wooden spoon, most people would opt for an electric mixer. Just keep beating until the mix turns a lighter color and becomes somewhat fluffy.


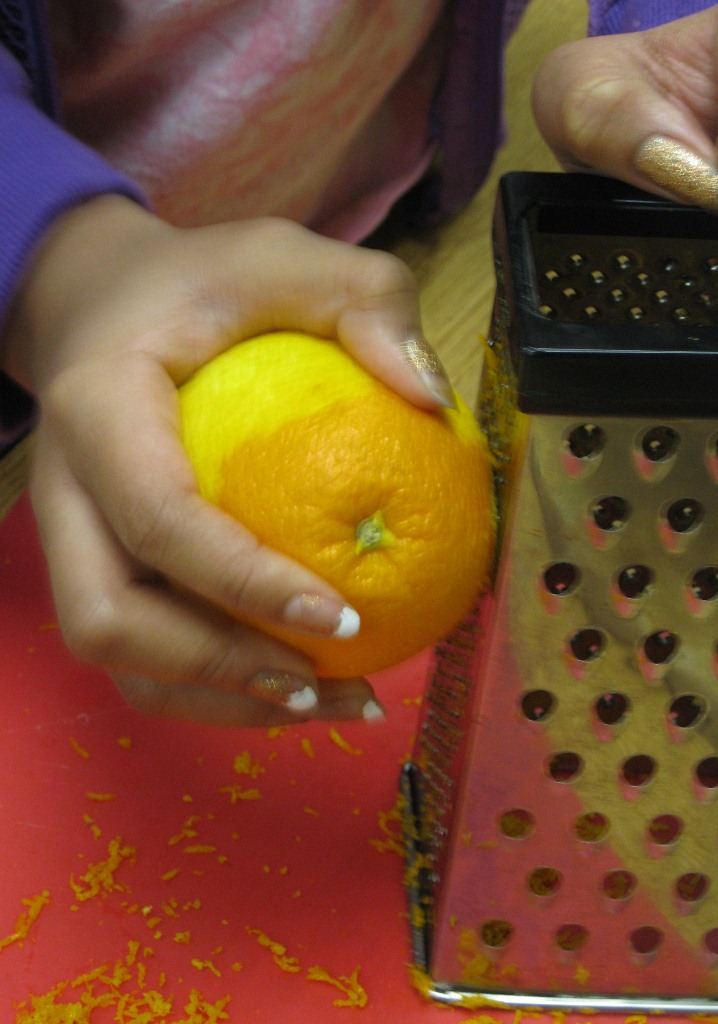
Grating orange peel the old-fashioned way

To the butter mix beat in 2 eggs, one at a time. Then add 2 tablespoons poppy seeds. Mix in 2/3 cup buttermilk, then gently add 1 3/4 cups all-purpose flour. Stir, scraping the sides and bottom of the bowl, until the flour is completely incorporated.

Grease a 9-inch bunt pan (we used Baker's Joy) and pour in the batter. Actually, this batter doesn't really pour. We scraped it out with a rubber spatula, then smoothed the top even. Give the pan a good tap on your table top to help spread the batter around.

Bake in a 350-degree oven for 45 minutes, or until a toothpick inserted into the middle of the cake comes out clean. Invert the pan over a wire rack and let the cake cool.

To "ice" the cake, poke it all over with a toothpick. This will help the orange-lemon mix seep into the cake, rather than running off the sides. Then, in a measuring cup, squeeze out 1/4 quarter cup orange juice and the juice from 1/2 lemon. Add 3 tablespoons granulated sugar and stir until the sugar is complete dissolved. Carefully drizzle the liquid all over the top and sides of the cake. Slice and serve.

This cake would go perfectly with a cold winter's afternoon tea.

Friday, December 16, 2011

Kids Make Danish Pebber Nodder (Christmas Cookies)


A little taste of Denmark for Christmas

By Ed Bruske

aka The Slow Cook

These may be the easiest cookies you'll ever make. In fact, you might say they're downright rudimentary. But one of my favorite spices--cardamom--gives these little shortbread nuggets--called pebber nodder in Denmark--a huge lift.

I was looking for something quick and easy for our last baking class before the holiday break. These cookies certainly filled the bill, but they looked a little too plain when they came out of the oven, so we dressed them up with a sprinkling of confectioner's sugar. They would work great in a selection of holiday cookies. And they get the kids in our food appreciation classes fully involved--creaming butter and sugar, mixing the dough, rolling it out, then taking turning cutting the dough into these little pillow shapes.

Start by creaming 1 cup (2 sticks) room temperature butter with 1 cup granulated sugar. Beat until the mixture lightens in color, then add 2 eggs, one at a time, beating until the eggs are completely incorporated. We do this by hand in a mixing bowl using a rubber spatula or wooden spoon, but of course you can also do it at home with an electric mixer.

Meanwhile, in a separate bowl, whisk together 2 1/2 cups all-purpose flour and 1 teaspoon each ground cinnamon and ground cardamom.


Cutting a log of dough into pebber nodder

Add the flour mix to the butter mix and gently blend until you have a smooth dough. Divide the dough into six balls--you might want to roll them in a little flour. Then, on a floured work surface, roll out one of the balls into a long, thin log--about the thickness of a cigar. Cut the log into 3/4-inch lengths and place these on an ungreased baking sheet, leaving some room around each nugget. Place in a 375-degree oven and bake 14 minutes, or until the pebber nodder are firm, the undersides lightly browned. Use an inverted spatula to move them to wire racks to cool.

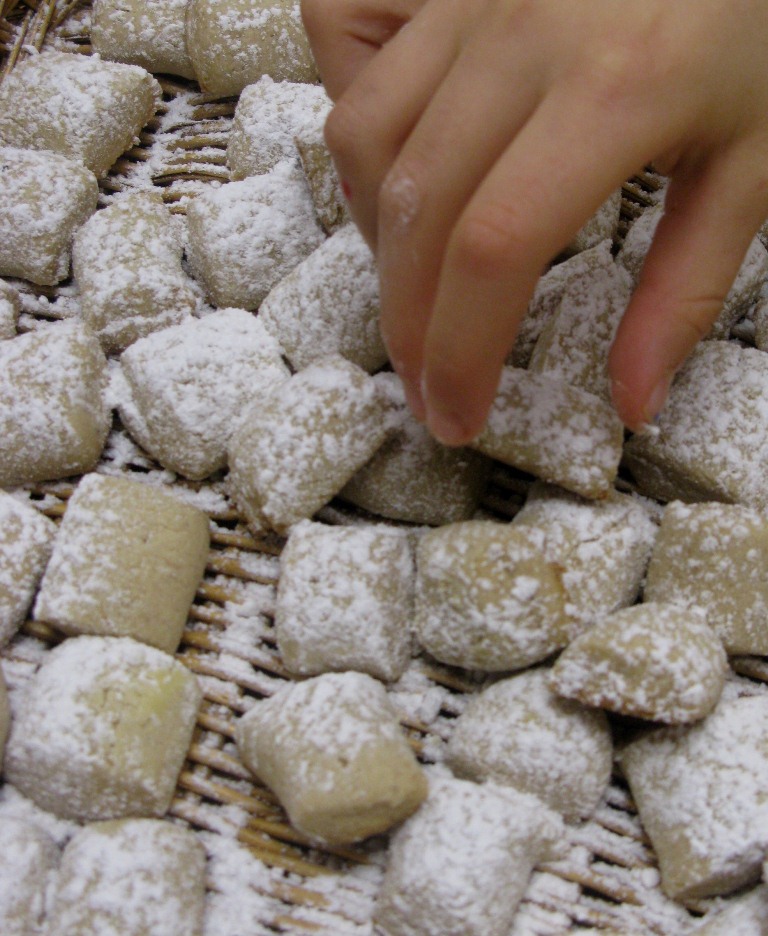
Working through each ball of dough individually, we filled a total of three baking sheets. In other words, this recipe makes a lot of pebber nodder. As they cooled, we transferred them to a basket where we dusted them with powdered sugar as you see in the picture above.

They are quite delicious. I'll bet you can't eat just one!

Friday, December 9, 2011

Kids Make Norwegian Lefse


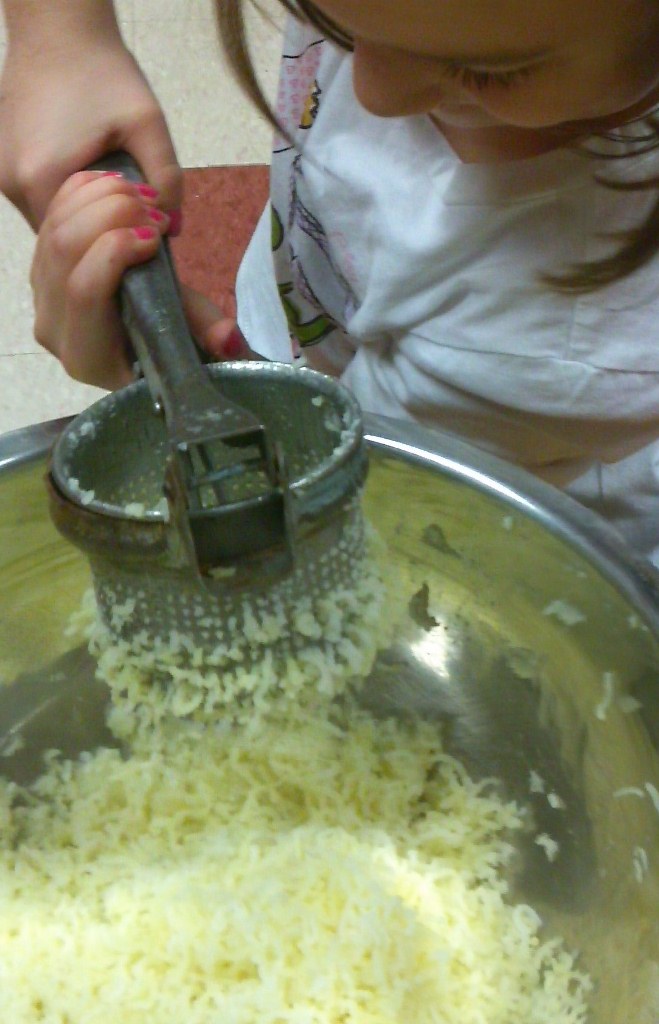
Ricing potatoes for lefse

By Ed Bruske

aka The Slow Cook

There could be no greater compliment for our Norwegian lefse than the one we got from our school nurse, Elizabeth, who said the lefse--or potato crepes--we made in our food appreciation classes tasted just like the ones her Norwegian grandmother used to serve.

Who knew? The Norwegians have their own version of a French crepe, except it's made with potatoes instead of flour and eggs. So instead pouring a thin crepe into a pan, you have to roll it out. Apparently the mark of a truly gifted lefse maker is rolling a perfectly round, paper-thin crepe. For this, Elizabether loaned us her grandmother's special wooden lefse roller. The roller is textured, leaving a distinct pattern on the finished crepes.

Otherwise, lefse are fairly easy. There are only only six ingredients: potatoes, heavy cream, butter, sugar, salt and all-purpose flour. The finished lefse are so simple, but delicious and comforting. Sprinkled with sugar or perhaps a dollop of fruit preserves, they make an easy dessert. Or you can stuff them with cheese for a savory snack or side dish.

Recipes vary, calling for more or less potato, more or less flour. I found that 2 1/2 pounds potatoes make plenty of lefse for our needs--about 15 large, finished crepes. We measured the flour loosely, eventually just taking handfuls from the bag until we had a manageable dough that wasn't sticky.

A day ahead, peel 2 1/2 pounds baking potatoes, cut into large dice and cover with plenty of water in a large saucepan. Cook until the potatoes are tender, then drain in a colander and pass the potatoes through a ricer into a large mixing bowl. Add 1/2 cup heavy cream and 4 tablespoons (1/2 stick) melted butter, along with 1 teaspoon salt and 1 tablespoon granulated sugar (omit if making savory lefse). Mix well, cover and refrigerate overnight.

The next day you'll want to have some sort of griddle on hand along with butter to grease it. The Norwegians have a special electric griddle for this purpose. We made our lefse on our portable butane stove at the prep table so the kids could watch the crepes cook, using for a griddle our cast-iron Mexican comal, essentially a skillet with no sides to interfere with our efforts to get under the crepes and flip them with an inverted spatula.

To the prepared potato mix, add 1 1/2 cups flour and work it in with your hands. Continue adding flour until a soft dough forms that is no longer sticky. You may need another 1/2 cup flour or more for this. Dump the finished dough onto a floured work surface and roll into a log about 3 inches across. You will cut pieces from the log to form individual lefse.

Slice enough doughfrom the log to make a small fistful, roll it into a ball and, using your floured work surface and a rolling pin, roll the dough into a paper-thin, round (--ish!) crepe. Carefully work an inverted spatula under the crepe, then lift and move the disc to a buttered griddle over moderate heat. Within a minute or two, brown spots will appear on the underside of the lefse. Flip it with the spatula and cook another minute more. At this point you can sprinkle the lefse with sugar (or with grated cheese, if making savory lefse). Fold the lefse in half twice to make a triangle shape.


Finished lefse, hot off the griddle

You can line the finished lefse on a platter to cool. You need do nothing more at this point than serve them, or perhaps dress them with a dollop of lingonberry jam. For savory lefse, you might want to place them into a hot oven to melt the cheese inside.

Lefse are a simple peasant food that must have brought great comfort to Norwegian families during long. dark winters. Elizabeth also encouraged us not to worry too much about rolling our perfectly round ones. She said hers usually turn out more square.

Friday, December 2, 2011

KIds Make Norwegian Christmas Cookies


Wire release scoop for making cookies

By Ed Bruske

aka The Slow Cook

What's special about Norwegian Christmas cookies?

They look like ordinary sugar cookies at first blush. But one bite is all you need to tell the difference: These cookies are chewy and full of almond, coconut and oats.

What? You say you've never heard of oats in Christmas cookies?

Our food appreciation classes have started their annual baking segment and with Christmas just around the corner I decided to lead off with these cookies so we could serve them at tonight's parents night dinner, which features a buffet of all the Scandinavian food we've been making lately.

As simple as the cookies look, they do require quite a bit of elbow grease if you're making them by hand. They're much easier if you're using an electric mixer. But in our classes, the mixer consists of a wooden spoon and kid muscle.

Start by placing 1/2 cup (1 stick) unsalted room-temperature butter in a large mixing bowl, alongwith 1 cup sugar and 7 ounces almond paste, grated. For the almond paste, we used the Odense brand, which comes wrapped in foil looking like a small sausage. It's somewhat soft, so grating it on a box grater takes a bit of work--great if your trying to keep a group of kids busy.

Mix until the ingredients are combined, then add 1 egg plus 1 egg white and beat on high for 3 minute. Picture a group of third-graders armed with a wooden spoon, imitating an electric mixer turned to "high."

Meanwhile, sift 1 1/4 cups all-purpose flour with 1 teaspoon baking powder and 1/4 teaspoon salt. Add this, plus 1 cup rolled oats and 1/2 cup sweetened coconut flakes. Mix until well combined, then form into balls and place on greased cookie sheets.


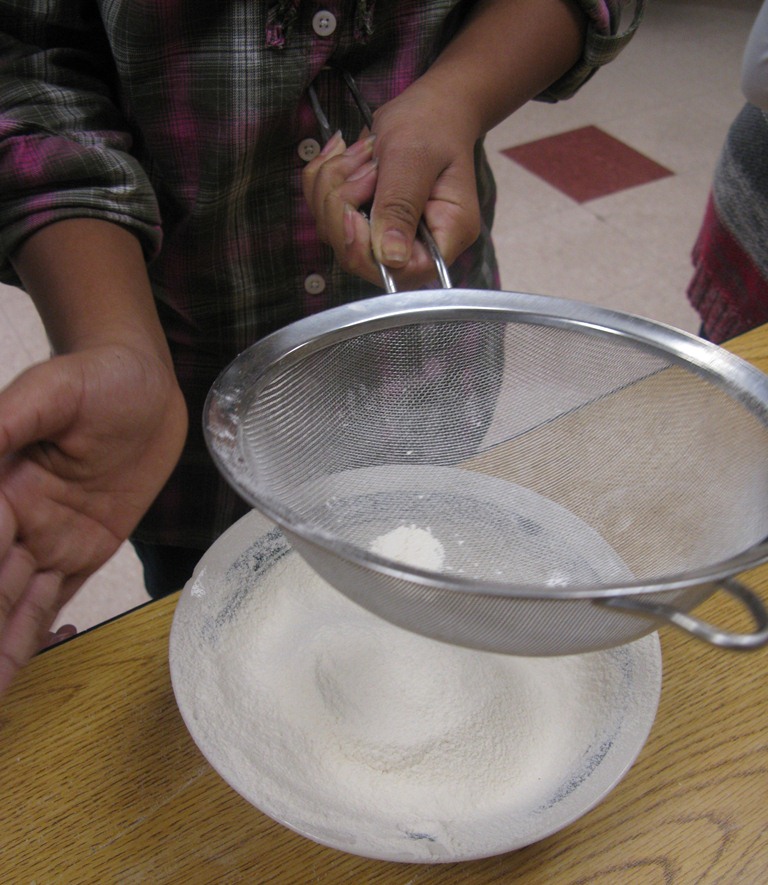
Using a fine seive for sifting dry ingredients

To make balls out of the dough, we used a 1-inch metal scoop with a wire release. If you have one a little larger, so much the better. It all depends on how big you want your cookies (or what kind of scoop you have on hand). I suppose you could do this with a spoon if you didn't have a scoop with a wire release. Once the balls are on the cookie sheets, you want to pat them down a little, either with the palm of your hand, or using the flat end of a glass moistened and dusted with granulated sugar.

We then decorated our cookies alternately with red and green sugar sprinkles. Place them in a 350-degree oven and bake just until they begin to show a little brown around the edges, or 10-11 minutes. An inverted metal spatula works best to remove the cookies from the pan and place them on wire racks to cool.

Merry Christmas from Norway!

Saturday, February 26, 2011

Kids Bake Carrot Cake with Cream Cheese Frosting

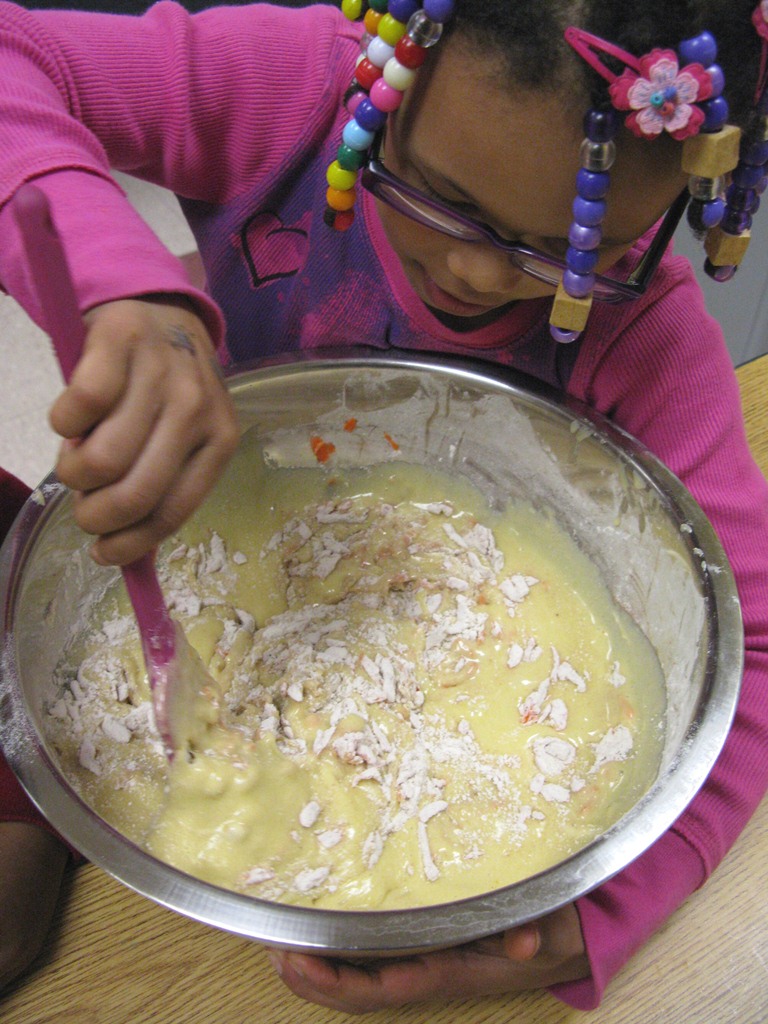
Mixing batter requires concentration

By Ed Bruske

aka The Slow Cook

This week marked our last session in this year's baking segment and I wanted the kids to end on a super-delicious note. So here's a carrot cake sure to satisfy the most demanding sweet tooth. Kids like sugar too much. So remember: food like this is intended as a special treat, not something to be consumed on a daily basis.

Carrot cake has the added advantage of requiring quite a bit of vegetable prep. That may not seem like an advantage to the average home cook. But if you are trying to keep a group of children busy in the kitchen, there's nothing like peeling and grating carrots. Hand a kid a vegetable peeper and she will occupy herself for the rest of the day.

This cake calls for a whole pound of carrots. We do everything by hand. But if you do not feel so inclined, feel free to plug in your food processed to speed up some of the chopping and mixing this recipe calls for.

First, prepare a 13-by-9-inch baking pan by greasing the inside of the pan, lining the bottom with a sheet of parchment paper and greasing the parchment paper. Set aside.

Kids will peel carrots all day

To the pound of peeled and grated carrots, add 2 1/2 cups unbleached all-purpose flour, 1 1/4 teaspoons baking powder, 1 teapsoon baking soda, 1 1/4 teaspoons ground cinnamon, 1/2 teaspoon grated nutmeg, 1/8 teaspoon ground cloves, 1/2 teaspoon salt. Mix well.

In a separate bowl, place 1 1/2 cups granulated sugar, 1/2 cup packed light brown sugar and 4 large eggs. Mix these together with a whisk and beat well until frothy and thoroughly combined. Continue beating while drizzling in 1 1/2 cups canola oil. Beat until the oil is completely emulsified.

Pour the wet mix into the dry mix and stir until all of the ingredients are incorporated. Pour the batter into the prepared baking pan and place in a 350-degree oven for 40 minutes, or until a toothpick inserted into the middle of the cake comes out clean. You might turn the pan from front to back halfway through the baking process.

Allow the cake to cool at least two hours before removing it from the pan. Invert it onto a cutting board or serving platter and prepare the frosting. Process 8 ounces softened but still cool cream cheese, 5 tablespoons unsalted butter softened but still cook, 1 tablespoon sour cream and 1/2 teaspoon vanilla extract. We used the back of a wooden spoon for this, but you can also use a food processor. When the mix is smooth, scrape down the sides of the bowl and add 1 1/4 cups confectioner's sugar. We used a rubber spatula to gently work the sugar into the cream cheese mix until it was completely incorporated and there were no lumps.

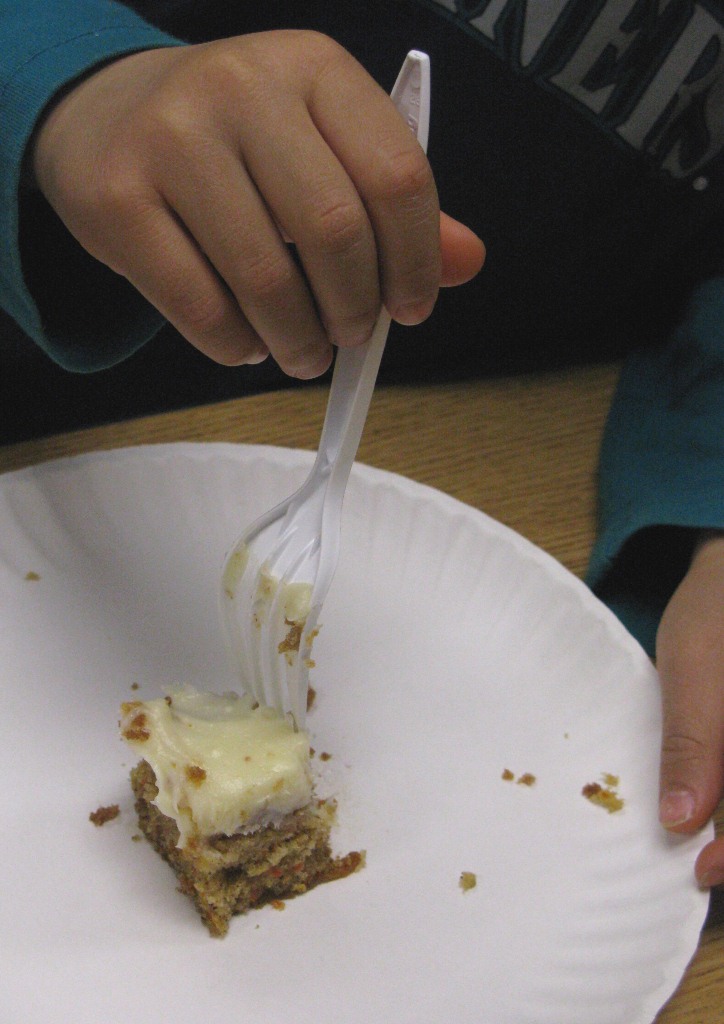
A dense and moist carrot cake

Use an offset spatula to first spread a thin layer of frost over the top of the cake. This will trap any crumbs so they do not show through when you spread the rest of the frosting.

Saturday, February 12, 2011

Kids Bake Sour Cream Coffee Cake

You have to beat this batter a lot

By Ed Bruske

aka The Slow Cook

The first thing my wife said when she heard that my food appreciation classes would be making this classic coffee cake by hand was this: "Be sure to tell the kids that it will be a lot better if they make it with an electric mixer."

We don't use electric gadgets in our cooking classes. We make everything by hand. In the case of this particular cake, my wife was dubious because the batter requires quite a lot of beating to get it to expand to its proper volume. But then she tasted the cake.

"Hmmmm," she said. "This is pretty good."

So I guess you can make these things by hand. But she's also correct: the batter does need a lot of beating. If you're doing it alone, your arm will be tired. So invite a bunch of kids to help. Or, just use your electric mixer. (And do be afraid to use your Cuisinart where chopping is called for, if that's your preference."

This is one of the more complicated recipes we've tackled. Getting the cake finally into the oven took the better part of an hour and you'll get numerous bowls and tools dirty. But the effort is worth it. Everyone exclaims that this is the best coffee cake they've ever eaten, with swirls of cinnamon and brown sugar inside and a topping crunchy with pecans (and of course more brown sugar and cinnamon.)

Be sure to read the recipe through entirely once or twice or even three times until you have a firm understanding of all the ingredients and how to use them. There are several steps.

First, make a streusel filling and topping for the cake as follows: In a bowl, mix 3/4 cup all-purpose flour, 3/4 cup granulated sugar, 1/4 cup packed dark brown sugar and 2 tablespoons cinnamon. Transfer 1 1/4 cups of this mixture to a second bowl, mix in another 1/4 cup dark brown sugar and set aside. This will be your streusel filling. Save the remainder for the topping.

For the topping, chop together 1 cup pecans and 2 tablespoons cold butter, cut into small pieces. Mix this with the remaining flour, sugar, brown sugar, cinnamon mixture. Set aside.

For the cake, blend 4 large eggs with 1 cup sour cream and 1 tablespoon vanilla extract. Set aside.

In a separate, large mixing bowl, mix together 2 1/4 cups all-purpose flour, 1 1/4 cups granulated sugar, 1 tablespoon baking powder, 3/4 teaspoons baking soda, 3/4 teaspoon salt. Blend with 12 tablespoons (1 1/2 sticks) softened butter and 1/2 cup sour cream until the dry ingredients are moistened. Then add about 1/3 of the egg and sour cream mixture and beat until fully incorporated. Continue adding the egg and sour cream mixture in two more batches, beating briskly until the batter has increased substantially in volume, becoming aerated and lighter in color.

Pour two cups of the batter into a greased angel food cake pan. Use a rubber spatula to smooth the surface of the batter. Sprinkle with 3/4 cup of the streusel filling mix (the one without the nuts). Add another two cups of batter as before and add the remaining streusel filling. Scrape the remaining batter into the pan, and finish by sprinkling in the topping with the nuts. In fact, this will be the top of your cake eventually.

Place the cake on a rack adjusted to the lowest setting in a 350 degree oven. Bake for 1 hour and 10 minutes, or until a long toothpick inserted into the middle comes out clean. (The original recipe called for baking 50 to 60 minutes. But using two different ovens, I found that consistently to be not long enough.)

Possilby the best coffee cake ever made by hand

Remove the cake from the oven and allow to cool in the pan 30 minutes at least. Then carefully score around the edges of the pan with a slender knife and invert the cake onto a cutting board. Invert it again onto a decorative platter so that it is right-side-up.

Plan to present this to family or friends at a special occasion. We're making it as part of the parents tea we are planning for later this month to conclude our baking classes.

Saturday, February 5, 2011

Kids Bake Orange Poppy Seed Cake

Applying elbow grease to cake baking

By Ed Bruske

aka The Slow Cook

Ever tried to cream butter and sugar with the back of a wooden spoon?

Most people would use an electric mixer. But we don't cotton to electric gadgets in our food appreciation classes. We do everything by hand on the theory that if kids know how to make things manually, they will better appreciate making them later with labor-saving devices. Besides, what did chefs do before they had electricity? Kids learn a lot about ingredients through intimate contact with them. I believe they should touch everything they cook.

But this is no sermon. The point is to make an orange poppy seed bundt cake as described in the original Silver Palate cookbook. Here's a warning: this recipe is loaded with sugar. But that's fine with the kids. As far as they're concerned, the sweeter the better. We are now preparing for a parents "tea" later in the month when we will display all of our creations on a spectacular buffet, along with tea, coffee and sparkling cider.

This is our first bundt cake and the hardest part, as I may have mentioned, is the first step: creaming the butter and sugar. You'll need 1 stick room temperature butter (eight tablespoons) and 1 1/2 cups granulated sugar. Most of you will probably pass on beating them together with a wooden spoon the way we did and choose the electric blender. Your choice. Creaming by hand is a lot of work. My wife tasted the final result and declared the cake a bit heavy. We probably didn't beat the butter and sugar enough. You want to mix them until they are light and fluffy.

Next, add 4 eggs, one at a time, beating well after each addition. In a separate bowl, mix together 2 cups flour, 2 1/2 teaspoons baking powder and 1/2 teaspoon salt. Add this mix to the creamed butter and sugar alternately with 3/4 cup milk--some dry mix, then some milk. Dry mix, milk. And so forth. Mix well after each addition, but don't beat the batter too much at this point.

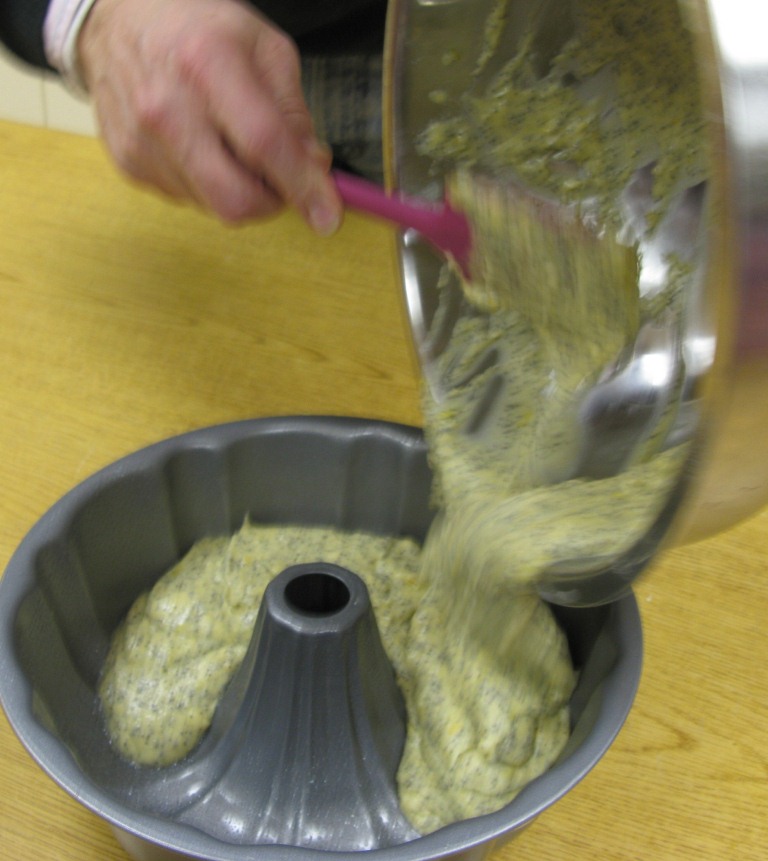
Pouring batter into bundt pan

To finish the batter, fold in 1/3 cup popper seeds, 1 teaspoon vanilla extract and the grated zest from two oranges. Pour the mix into a greased bundt pan and bake in a 325-degree oven for 55 minutes, or until a toothpick inserted into the middle of the cake comes out clean.

Allow the cake to cool in the pan for 30 minutes, then invert the pan and remove the cake onto a serving platter. The final step is to soak the cake with a syrup of orange juice and sugar. Pour 1/2 cup orange juice and 1/2 cup sugar into a small sauce pan. Heat until bubbles begin to form, then simmer for about 5 minutes, or until syrupy. Use a long toothpick or skewer to poke holes deep into the cake, then pour the syrup over the cake.

Serve warm if possible. The kids might complain that their slices aren't big enough. Pay no attention. There will be plenty of cake left for the next day.

Saturday, January 29, 2011

Kids Bake Dried Fruit and Cream Scones

Very little kneading required for these scones

By Ed Bruske

aka The Slow Cook

If you have a few minutes to chop dried fruit, these scones are surprising easily and some of the best we've ever tasted. They come strait from Marion Cunningham's The Breakfast Book, but if you aren't making them for breakfast, organize your own tea. They'd also go swell with a cup of hot chocolate.

They're made with baking powder--a combination of baking soda and cream of tartar--which activates and gives the dough some lift when you add the cream. The crumb of these scones is light and--because of the heavy cream in the mix--noticeably creamy. For dried fruits we chose what was readily available at the local Harris Teeter: apricots, cranberries and raisins. But you could just as easily use prunes or dried figs, even dried apples, I suppose, or cherries.

As usual, I let the kids in my food appreciation classes--currently baking classes--do all of the work. They struggled a bit trying to make little pieces out of dried appricots with their steak knives. But that's the beauty of cooking with kids. Give them a tool and a task to perform, and they are set for the rest of the day. Just make sure they're using the knife properly and not chopping their fingers. (We haven't had an accident yet because our first rule is, "No blood in the food!")

Start by mixing together in a large mixing bowl 2 cups all-purpose flour, 1 tablespoon baking powder, 1/2 teaspoon salt, 1/4 cup sugar, 1/2 cup chopped dried fruit and 1/4 cup golden raisins. Stir in 1 1/4 cups heavy cream, scraping the bowl until all of the dry and wet ingredients are incorporated. Turn the dough out onto a floured work surface and knead perhaps eight or nine times, or until though holds together in a smooth ball.

Pat the ball into a circle about 10 inches around. It will be about 1 1/2 inches tall. Cut it into 12 wedges and place these on an ungreased baking sheet. Brush the tops with melted butter (you'll need a scant 2 tablespoons) and dust with granulated sugar.

Place the scones in a 425-degree oven for 15 minutes, or until they are lightly golden.

Chopping dried cranberries

These scones are especially delicious served fresh and warm from the oven. But they will keep several days in a well-sealed tin.

Saturday, January 22, 2011

Kids Bake Banana Bread with Cocoa Nibs

Banana bread: it's so darn irresistible

By Ed Bruske

aka The Slow cook

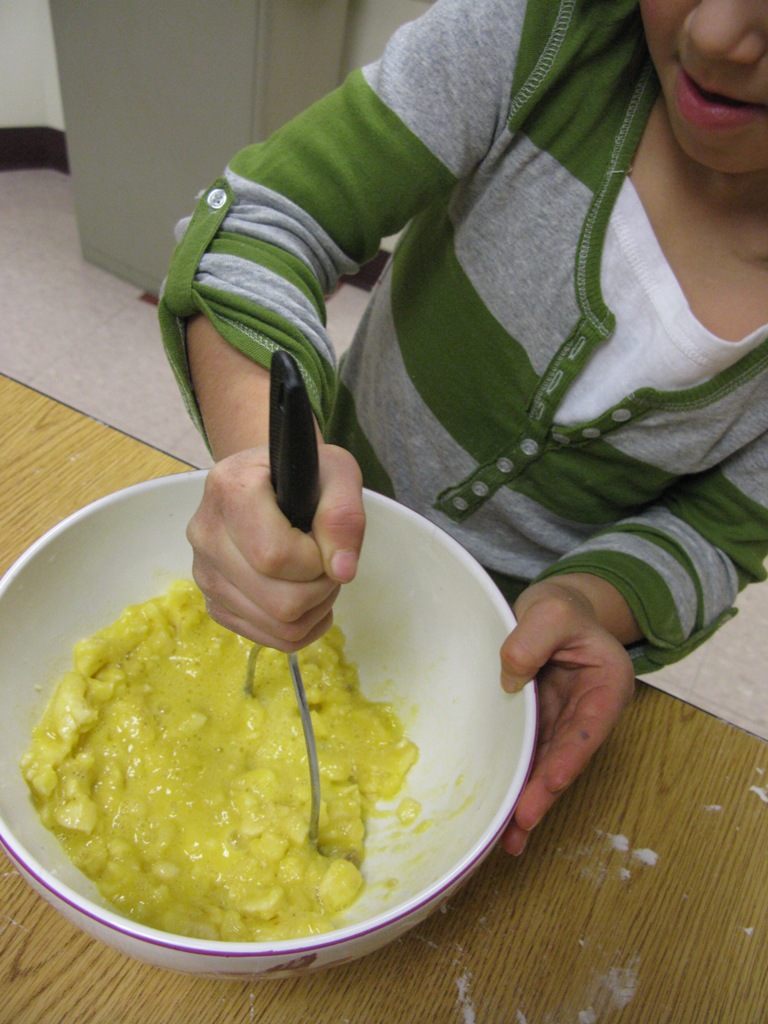
Is there anything more fun than smashing bananas with a potato masher?

My wife, who hates bananas but loves banana bread, urged me to try this recipe with the kids in my food appreciation classes because "it's so easy." I suppose you could say that about banana bread in general. This is how we dispose of our over-ripe bananas. If they get too ripe and we don't have a spare second to make banana bread, we put them in the freezer for later.

Kids who wouldn't touch a banana with a brown spot on it are still mad for banana bread. Bananas just keep getting sweeter as they get older. (Not necessarily true of people, eh?)

This is another example of a delicious treat made with a chemical rise--baking soda combined with a bit of tangy yogurt. I also used this as an opportunity to introduce the kids to something called "cocoa nibs." Are you familiar? These are bits of unprocessed, unsweetened cocoa beans. Whole Foods carries them. They're not cheap. But they help produce a banana bread that's not so sweet it sets your teeth on edge like some do, and they give the bread a nice toothsomeness. Otherwise, you could substitute chopped walnuts if you prefer.

Smashing bananas is great fun

As always, we mix the dry and wet ingredients separately. In a large mixing bowl, stir together 2 cups unbleached all-purpose flour, 1/2 cups cocao nibs, 3/4 cup sugar, 3/4 teaspoon baking soda, 1/2 teaspoon salt.

In a second bowl, beat two eggs, then add 3 very ripe bananas (peeled, of course). Crush the bananas with a potato masher until they are almost liquid. Stir in 1/4 cup plain yogurt, 6 tablespoons melted butter and 1 teaspoon vanilla extract.

Pour the wet ingredients into the dry mix and stir just until everything is completely incorporated. Grease a 9-by-5-inch loaf pan and dust it with flour. Then pour the batter into this and place on a rack set in the lower-middle of a 350-degree oven. Bake until a toothpick inserted into the middle of the bread comes out clean, about 55 minutes.

Remove the loaf from the pan and set on a wire rack to cool. Personally, I like my banana bread smeared with cream cheese. The kids had never heard of this, but once they tried it, I couldn't keep them away from the cream cheese.

Saturday, January 15, 2011

Kids Bake Soda Bread

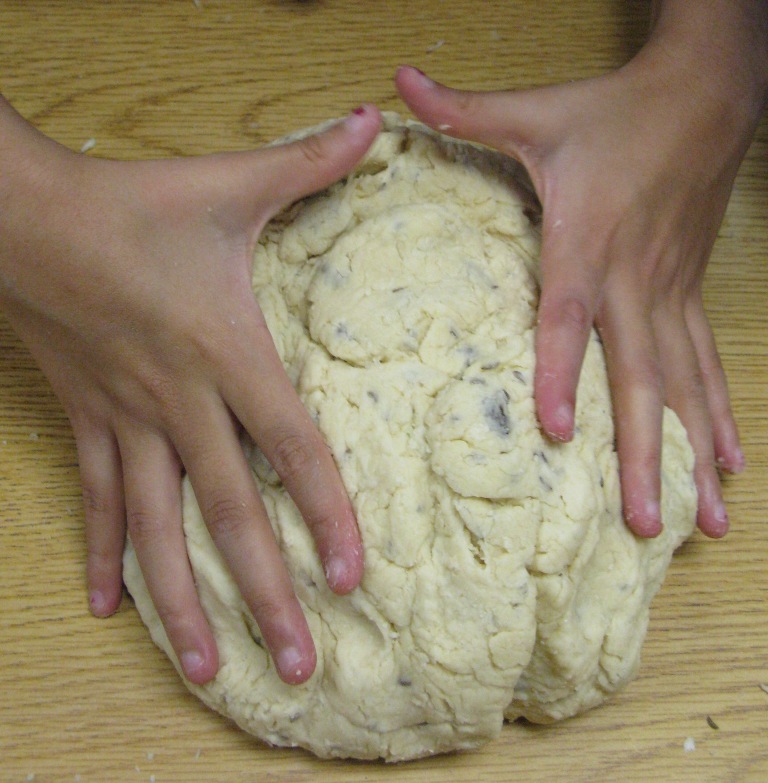
Just a little bit of kneading is all it takes

By Ed Bruske

aka The Slow Cook

I was looking forward to teaching the kids in my food appreciation classes about the simplest kind of Irish soda bread baked in a cast-iron pot. But then my wife steered me toward this recipe, which is a more Americanized take on the the classic, including two kinds of flour, a little egg, raisins and caraway seeds.

This is another lesson in quick breads, or those made with chemical rising agents--in this case baking soda and cream of tartar, mixed with buttermilk--instead of yeast. It makes a lovely loaf of semi-savory bread, well worth a little extra trouble. Serve it warm--fresh from the oven--with a pot of your favorite fruit preserves.

For dry ingredients, stir together in a large mixing bowl 3 cups (15 ounces) unbleached all-purpose flour, 1 cup (4 ounces) plain cake flour, 1/4 cup sugar, 1 1/2 teaspoons baking soda, 1 1/2 teaspoons cream of tartar, 1 1/2 teaspoons salt. Add 4 tablespoons (1/2 stick) room temperature butter cut into small pieces. Cut the butter into the flour until the mix resembles a loose grain. (We used our fingers for this, pinching the flour and butter together--a great activity for the kids.)

Meanwhile, in a separate bowl, beat 1 egg and stir in 1 1/2 cups buttermilk. Add 1 cup raisins and 1 tablespoon caraway seeds.

Pour the liquid into the dry ingredients and stir until everything is thoroughly incorporated. Pour the dough onto a work surface dusted with flour and knead just until the dough holds together in a soft ball. Place the ball onto a greased baking sheet, or a baking sheet lined with parchment paper, and pat it down until it is about eight inches around and two or three inches high. Score the top into a cross with a sharp knife.

Strawberry jam with your soda bread?

Place on the upper-middle rack of a 400-degree oven for 40 minutes, or until the internal temperature of the bread reads 170 degrees. Allow to cool for a bit before cutting into wedges. You can also brush the top with melted butter for a nicely burnished look.

Saturday, January 8, 2011

Kids Bake Souffled Corn Bread

Who doesn't like a slice of warm corn bread?

By Ed Bruske

aka The Slow Cook

The baking lessons in our food appreciation classes turn to making quick breads and teaching kids the difference between yeasted breads and those made with a chemical rise. Not everyone has time to wait for yeast to work its magic on bread. Hence bakers turn to a chemical reaction between a dry ingredient such as baking soda and a wet ingredient such as buttermilk. The baking soda, which is alkaline, reacts with the acid content of the buttermilk to create a kind of frothiness to the batter. Think of what happens when you drop an Alka Seltzer tablet in a glass of water.

Another common rising agent is baking powder, consisting of baking soda and an acid salt such as cream of tartar already mixed in. For our lesson this week, I chose to make a corn bread that happens to use both baking soda and baking powder. This is a classic corn bread recipe with an upscale twist: beaten egg whites are folded into the batter to give the bread even more lightness, although this is nothing like the cakey, sweet "corn bread" you might be used to.

This is the kind of corn bread you might serve for a special Sunday supper. We served it a choice of all-fruit strawberry or blueberry jam.

A heavy iron skillet really works best as the baking vessel. In some Southern households, it was customary to have at least one heavy iron skillet on hand devoted to making corn bread. From frequent use, the skillet would become well-seasoned and non-stick. You may not have an iron skillet devoted to making corn bread. If you don’t have an iron skillet at all, can I suggest getting one? It is a great kitchen tool, something we use all the time.

1 1/2 cup white cornmeal (or substitute yellow cornmeal)
1/2 cup all-purpose flour
2 teaspoons baking powder
1 teaspoon baking soda
1 teaspoon salt
1 1/2 cups buttermilk
2 eggs, separated
3/4 cup (or 1/2 14-ounce can) creamed-style canned corn
3 tablespoons melted butter

Preheat oven to 425 degrees

In a large mixing bowl, combine dry ingredients. In a large measuring cup or bowl, mix buttermilk, egg yolks, creamed corn and melted butter. (I melt the butter in the iron skillet in the oven, which has the added virtue of greasing the skillet. Simply pour the butter, once melted, into the measuring cup with the other wet ingredients, then put the skillet back in the oven to heat up again.)

In a separate mixing bowl, beat eggs whites to stiff peaks.

Meanwhile, pour wet ingredients from measuring cup into dry ingredients and mix until just incorporated. Then fold in the beaten egg whites. Pour the mixture into the hot skillet. If the batter bubbles around the edges, you know you are on the right track. Place the skillet in the oven and bake until the top of the corn bread is lightly browned and a toothpick inserted into the middle comes out clean, about 30 minutes.

Saturday, December 11, 2010

Kids Make Gingerbread Cookies

Just in time for the holidays

By Ed Bruske

aka The Slow Cook

Kids turned out in droves for the first of my new "baking appreciation" classes. They've longed for something sweet instead of those nasty old vegetables we usually cook all the time.

Since I'm not a professional baker, I was looking for something fairly simple but also seasonal and appropriate as a dessert for tonight's parents dinner, which has a Moroccan theme. Okay, so gingerbread cookies are exactly Moroccan (at least I don't think so). But spice-wise, they do have a passing affinity with North African cuisine. I'm referring to the cinnamon, of course.

One reason for baking with kids it to teach science and math. The components of baked goods often react with one another chemically in precise ways to yield the products we like so well. Also, we measure much more carefully when baking, hence the need to learn fractions and weights. In fact, weighing ingredients such as flour is more accurate than measuring in volume. So I brought along a scale as well.

Pretty soon, the aroma of our spicy cookies were drawing admirers from all over school.

This recipe comes from The New Best Recipes, from the same people who bring you Cook's Illustrated magazine. It's a big, thick book that's all about taking classic dishes and fiddling with them to come up with a recipe that produces the very best in its class. Thus, the authors discovered that the best gingerbread cookies require a little more fat (butter) than most traditional recipes call for. So we're going with that.

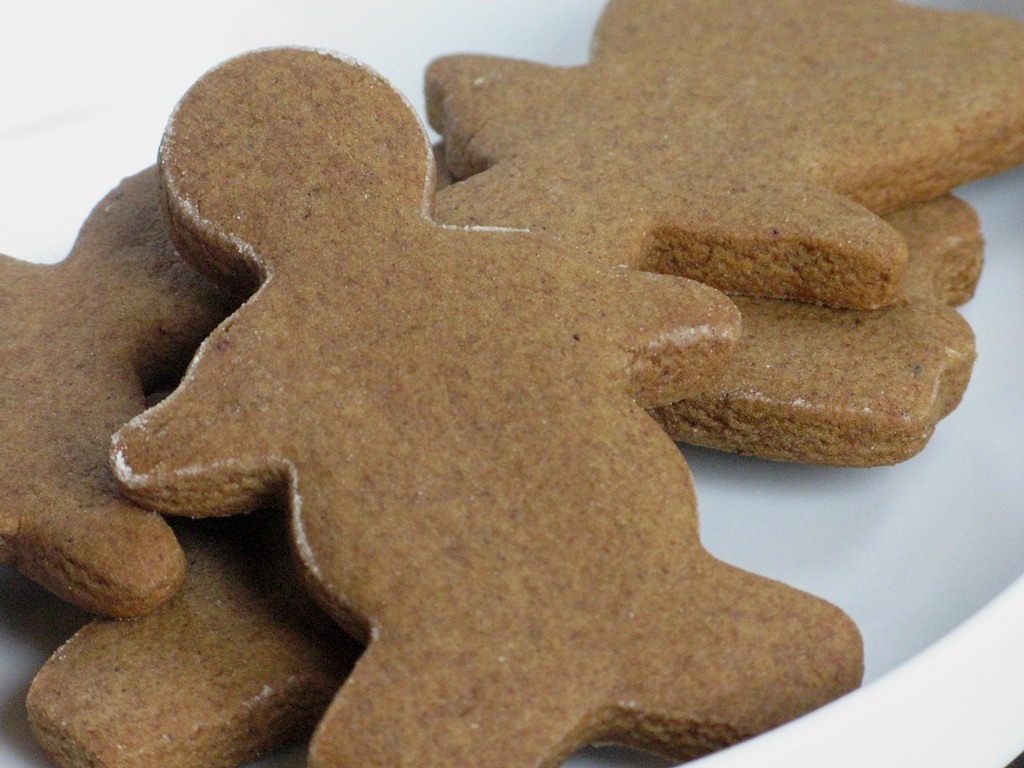
We've halved the published recipe and adapted it by hand, rather than with an electric food processor or blender. But you can certainly opt for one of those gadgets if you prefer. This recipe yields 40 cookies such as those you see above. To make ornaments suitable for hanging on your holiday tree, simply make a hole in the appropriate spot before the cookies go into the oven.

Preheat oven to 325 degrees.

Mix together 7.5 ounces (1 1/2 cups) unbleached all-purpose flour with 2.5 ounces dark brown sugar, 3/8 teaspoon baking soda, 1 1/2 teaspoons ground cinnamon, 1 1/2 teaspoons ground ginger, 1/4 teaspoon ground cloves and 1/4 teaspoon salt. We used a pasty cutter to break up the brown sugar, then crushed any reamaining sugar lumps with our fingers.

Dot the top of the flour mix with 6 tablespoons unsalted butter, cut into pieces. Cut the butter into the flour mix: We used a pastry cutter first, then finished the job with our fingers, rapidly pinching the butter and flour together until the mix resembles coarse sand.

Our pastry cutting tool

Use a greased measuring cup to add 3/8 cup dark molasses to the flour and butter mix. Add 1 tablespoon milk as well. Stir everything together with a wooden spoon. When all of the ingredients are incorporated, use your hands to form the dough into a ball, kneading it a few times if necessary to create a smooth mass.

Divide the dough in two. Place each half between sheets of parchment paper and roll the dough out to a thickness of 1/8 inch. Lay the dough packages on a sheet pan and place in a freezer for 20 minutes to stiffen, or in a refrigerator for at least a couple of hours or overnight.

When the dough is chilled, remove the top sheet of parchment paper from one piece and invert it onto a floured work surface. Remove the second sheet of parchment paper. Use lightly-floured cookie cutters to create the shapes you like and place them on a greased baking sheet, or on a sheet pan lined with parchment paper. Place in oven and bake until cookies are firm when pressed in the middle with a finger, about 20 minutes.

Use an small, offset spatula to remove the cookies from the pans. When they have cooled, store them in a cookie tin or sealed container, using parchment paper to separate each layer of cookies.

You could decorate these cookies if you like. We'd need another class for that.